Expert Tips for a Smooth and Successful EPDM Roof Installation

Installing an EPDM roof can feel overwhelming, but it doesn’t have to be. With the right guidance and expert tips, you can achieve a smooth and successful installation.
This guide will walk you through everything you need to know, from preparation to finishing touches, ensuring your new roof stands the test of time. Let’s get started on making your EPDM roof installation a breeze!
Choose the Right Weather Conditions
Choosing the right weather conditions is crucial for a successful roofing installation. Avoid installing your EPDM roof on rainy or snowy days. The best time for roofing installation is during dry and mild weather.
This ensures the adhesive sticks properly and the material lays flat. Check the weather forecast to plan your installation on a clear day. Proper weather conditions help to avoid delays and ensure a strong, durable roof.
Use High-Quality Materials
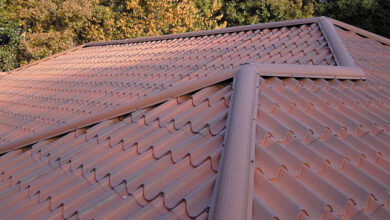
Using high-quality roofing materials is essential for a long-lasting EPDM roof. Opt for top-grade EPDM membrane and adhesives to ensure durability and performance. High-quality materials can withstand harsh weather conditions and resist wear and tear.
Cheap alternatives might save money initially but can lead to costly repairs and replacements in the long run. Investing in the best roofing materials guarantees a stronger, more reliable roof that will protect your home for years to come.
Ensure Proper Adhesion
Ensuring proper adhesion is key to the success of your EPDM roof. First, clean the surface where you will apply the membrane. Remove any dirt, debris, or old adhesive. Next, apply a primer to the surface for better sticking power.
Roll out the EPDM membrane and smooth it out to remove any air bubbles. Use a roller to press the membrane firmly into place. This step helps the adhesive bond strongly with the surface, making your roof more secure and durable.
Pay Attention to Seams and Flashings
Seams and flashings are critical areas to focus on during your EPDM roof installation. First, ensure all seams are clean and dry before applying any adhesive. Apply a generous amount of seam adhesive and press the seams firmly together. Use a seam roller to ensure a tight bond.
When dealing with flashings around vents or chimneys, cut the EPDM membrane to fit snugly around these areas. Secure the flashings tightly to prevent any water leaks. Proper attention to seams and flashings helps keep your roof waterproof and extends its lifespan.
Consider Professional Installation
For many, the idea of installing an EPDM roof on their own is daunting. That’s why seeking professional help can be beneficial. Experts have the experience to ensure every detail is perfect. They can also detect potential problems early on, saving time and money in the long run.
If you’re located in the area, one option to explore is reliable commercial roof repairs in Southern California. Professional installers and repairers bring peace of mind, knowing your roof will be completed to the highest standard.
Learn All About EPDM Roof Installation
In conclusion, EPDM roof installation might seem tough at first. But with good weather, high-quality materials, and the right steps, it’s doable. Pay special attention to seams and flashings for a leak-free roof.
If it still feels too hard, hiring a professional can be worth it. They ensure everything is done right, saving you trouble later. So, whether you do it yourself or get help, a well-installed EPDM roof will last a long time.
Visit our blog for more!