My first instructable is this one. Let’s look at how to build an audio amplifier that you can use with your iPod, guitar, piano, and other musical instruments. Let’s start the voyage now.
Disclaimer: I won’t be held accountable if using this tutorial causes you any harm. Proceed at your own risk.
Components
The following elements are necessary.
- Semiconductor (IC) LM3886,
- Two 10 uF and two 100 nF capacitors for Cs,
- One 100 uF capacitor,
- Two 1.0 kΩ resistors,
- One 20 kΩ resistor,
- One 33 kΩ resistor for Rm,
- One volume potentiometer, 10 kΩ
- One 22 uF capacitor,
- And a small heat sink, for example a discarded CPU cooler.
- Hookup wire and connectors for the input and output.
You may get these electrical parts from a nearby electronics store. These parts are all generally available and simple to find, so you won’t have any trouble finding any of them.
Circuit Diagram
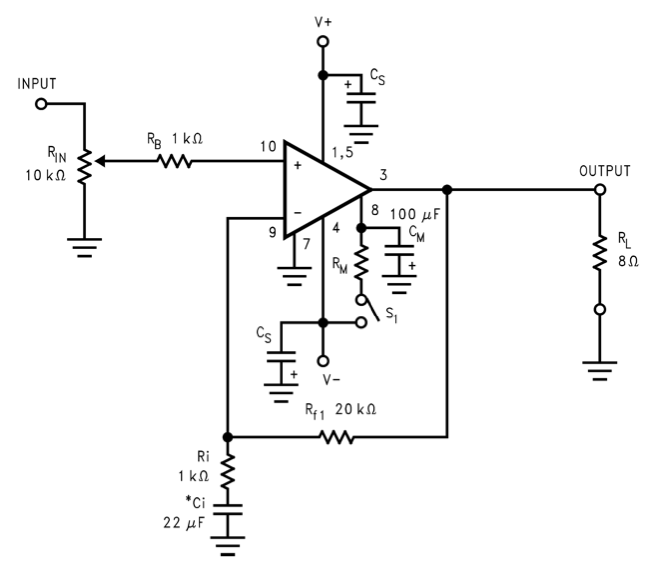
The circuit diagram of the LM3886 amplifier is shown below.
Volume Control
Rin acts as the volume control. This control should be a potentiometer with logarithmic or audio taper to ensure a natural relationship between the rotation of the pot and the loudness.
Setting the Gain
Ri and Rf1 set the gain of the amplifier. The minimum supported gain is 10x (20 dB). The gain can be calculated as: Av = 1+Rf1/Ri. With the values shown above you get reasonably close to the standard amplifier gain of 20x (26 dB). The actual gain of this circuit is 21x (26.4 dB).
Setting the low-frequency limit
Ci sets the lower frequency limit of the circuit. This frequency can be calculated like this: fc = 1/(2*π*Ci*Ri), thus with the values shown the low-frequency cutoff will be 7.2 Hz.
Muting
Rm and Cm ensure a smooth start-up of the amplifier. Rm needs to be sized such that a minimum of 500 uA flows in the mute pin of the IC. There is little benefit from going beyond 1 mA, so 33 kΩ is a good value for most uses. Closing the mute switch will mute the output of the amplifier.
Heat Sinks
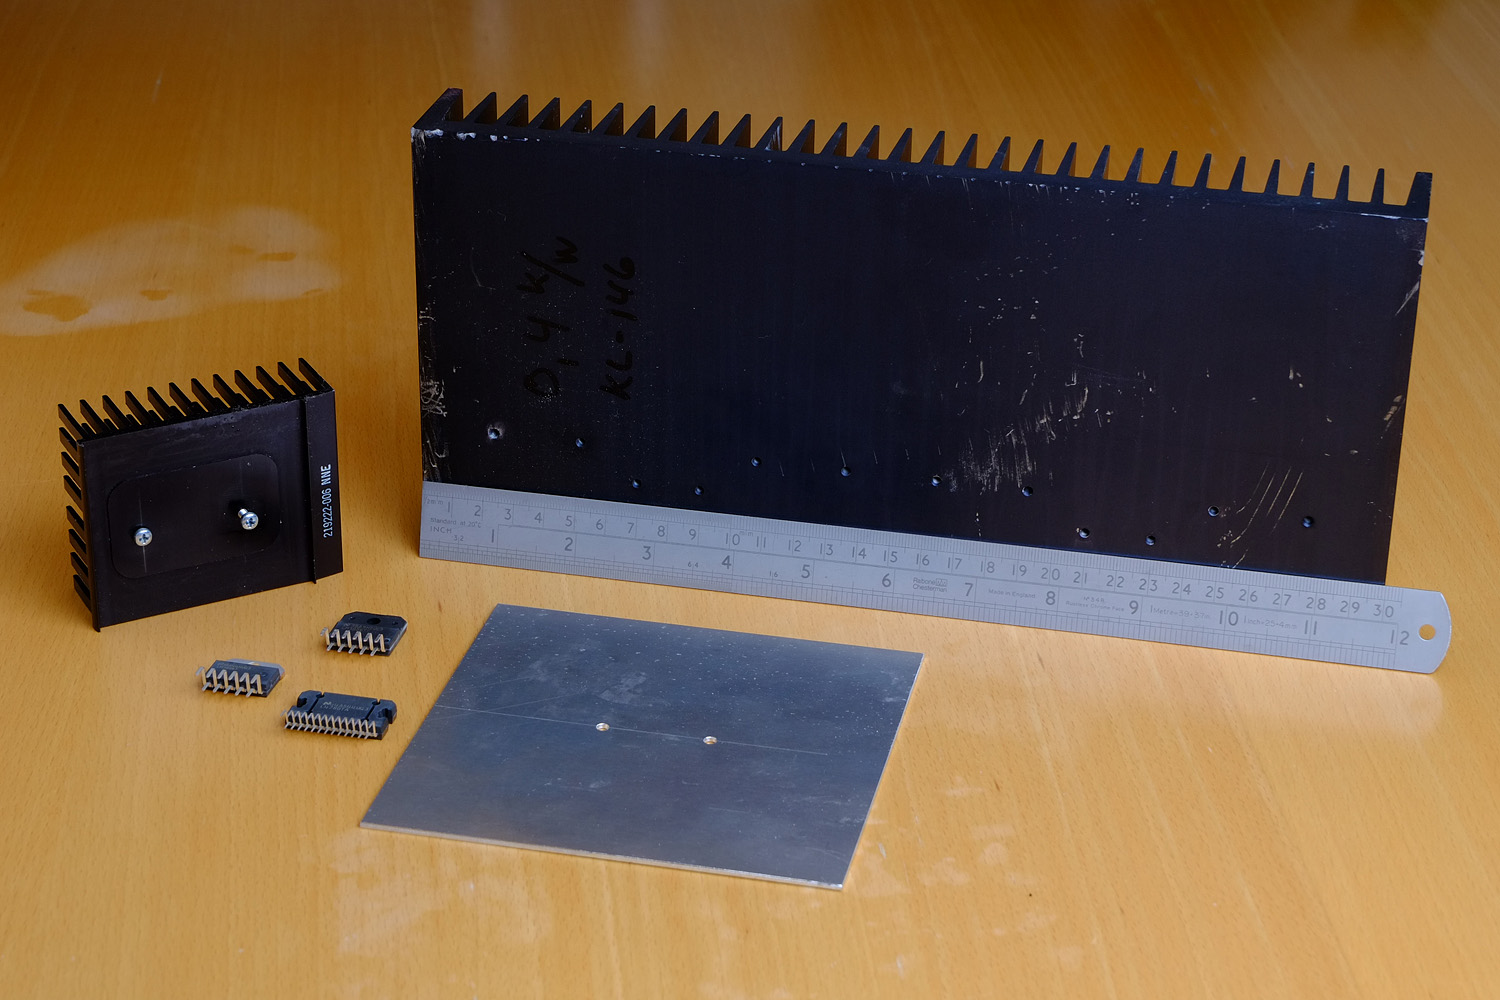
The LM3886 amplifier IC must be fitted with a heat sink. A discarded CPU heat sink such as the one shown on the left in the image below can be handy here.
Building the Amplifier
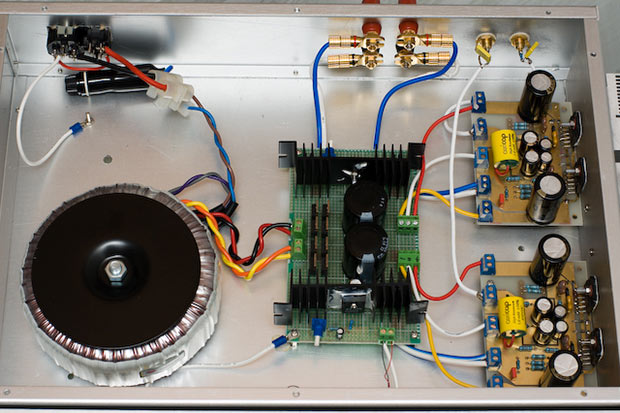
The amplifier can be built using a prototype circuit board (Vector board) or it can be built point-to-point as shown below. If you choose to build the amplifier point-to-point be really careful not to create any unintended connections.

There are also many circuit boards available for this application, including the LM3886 Done Right by Neurochrome.
Testing
Finally, connect the power supply to the V+, V-, and ground pins shown in the schematic. A power supply in the range of ±24 to ±30 V is appropriate for an audio amplifier that will power a 4 Ω or an 8 Ω speaker.
Congratulations! You have constructed a basic audio amplifier on your own.
It’s time to investigate it now. Connect the output connector to the speakers and the input to your audio source, for example, an MP3 player or media streamer. To achieve the best and loudest sound possible, now adjust the volume control. This is a very powerful amplifier. Take caution when making adjustments since it may harm your speakers.
The connectors can be changed based on your needs.
Important Things to Consider
Firstly, prioritize safety—acknowledge the disclaimer’s caution and proceed with a keen awareness of potential risks. Understanding the components is paramount; familiarise yourself with the semiconductor (IC) LM3886 and other elements like capacitors and resistors. LM3886 is an easy-to-use and low-distortion amplifier that provides built-in protection against short circuits.
Consider the compatibility of your amplifier with different instruments and devices. The choice of input jacks can shape the connectivity landscape, allowing customization to suit your needs. As you embark on this DIY journey, don’t overlook the significance of adjustments—fine-tune gain and volume with care to avoid unintended consequences. The balance between experimentation and caution is key. Ultimately, these considerations not only ensure the success of your amplifier project but also contribute to a safe and enriching experience in the realm of audio craftsmanship.
Conclusion
In the symphony of DIY audio amplifiers, you’ve just composed your first movement. Congratulations on successfully navigating the electronic orchestra and bringing your amplifier to life! As we close the curtain on this instructable, remember that the journey was about more than just connecting wires and components—it was about creating a bridge between your creativity and the world of sound.
With common components and an adventurous spirit, you’ve crafted a musical companion that can harmonize with your iPod, guitar, piano, or any instrument that strikes a chord with you. The steps, though intricate, guide you through a dance of resistors, capacitors, and connectors, leading to the grand finale—a functional audio amplifier ready to amplify your tunes.
As you plug in and play, take pride in your DIY creation. Experiment with the gain and volume controls, letting your musical masterpiece resonate with the perfect balance. Yet, as the disclaimer wisely reminds us, proceed with caution—adjustments should be made with care to avoid any unintended harm to your speakers.
So, fellow audio lover, embrace the melody you’ve orchestrated and let your homemade amplifier be the note that resonates through your musical endeavors. The curtain may fall on this instructable, but your newfound amplifier is ready to take center stage in your sonic journey. Bravo!